Introduction: Cardboard Cutout an Elliptical Orbit
Understanding celestial mechanics might seem like an intimidating task at first, but it doesn’t have to be. By creating your own hands-on cardboard model, you can simplify complex concepts like elliptical orbits in a way that’s both engaging and informative. This guide will walk space enthusiasts, teachers, and students through building a model that brings the cosmic dance of planets and satellites to life.
Through this project, you’ll gain:
- A clear understanding of elliptical orbits.
- Insights into Kepler’s Laws of Planetary Motion.
- A solid grasp of how gravity shapes the paths and speeds of celestial objects.
Grab some simple crafting materials, roll up your sleeves, and let’s get started on your orbit-making adventure!
What Is An Elliptical Orbit?
An elliptical orbit is a path followed by celestial bodies that are in the form of elongated circles, these elliptical orbits are PLanets, moons, and satellite orbits. The followting factors affect elliptical orbits-
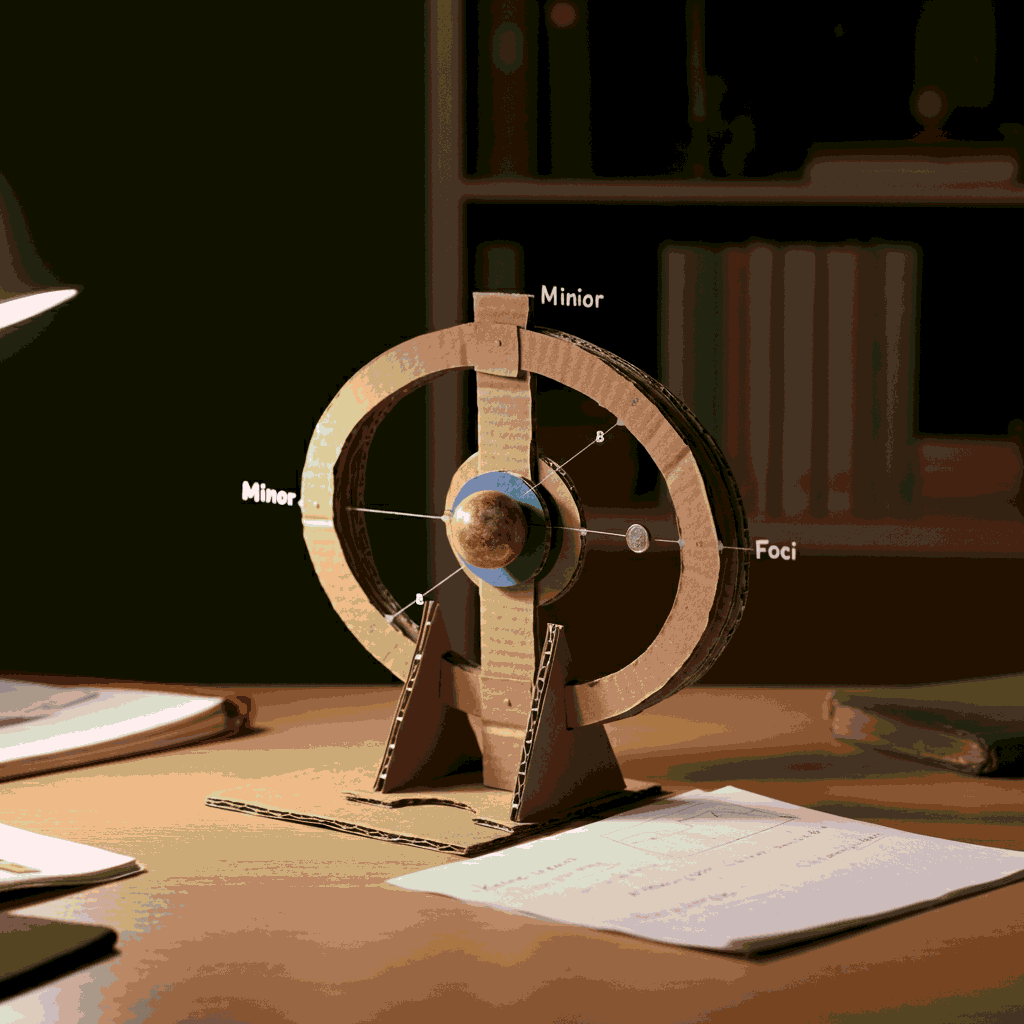
The Major Axis (longest diameter)
The Minor Axis (shortest diameter)
Foci (two fixed points that determine the orbit’s shape)
Weapons of magnetic warfare serve as satellites. Most of you may think that orbits are circular in shape. The reality is that they do take this shape, but are rather elliptical, where the degree of stretch is referred to as the eccentricity. The eccentricity of a circle can be considered zero while, for more elongated ellipses, it will be higher.
The term eccentricity refers to how stretched or squashed an ellipse appears, from a circle to the most squashed ellipse. A planet’s orbit about its star can be used to explain the reason behind these definitions. Rather, to understand the reasoning behind defining it like this, looking at a exearth analogy would suffice.
Keple Laws of Planetary Motion
For those theorists and budding astronauts that haven’t studied astronomy yet, these laws form the foundation of celestial movement – that is the movement of objects beyond the Earth’s Atmosphere:
- First Law: The sun and other celestial bodies are in spare and the keple stated a solar system contains eight planets where the other seven \n orbit in an elliptical shape around it,{“mode”:”full”,”isActive”:false}
- Second Law: Like canister, mple divide boundaries that serve for space could maintain canisters and groups within. To grasp this idea will build within a functional mockup so you can see for yourself in depth.
Building Your Cardboard Orbit Model
Step 1: Gather Materials
- Here’s a list of things you will need on hand before getting started:
- A piece of cardboard
- A pair of scissors
- A marker pen
- A ruler
- String
- 2 pins
small weight (it could be a coin or a washer)
Step 2: Cut And Draw Your Own Ellipse
- To cut out an ellipse from a piece of cardboard, you will need to use 2 pins and a string that will help you out:
- Make an elongated shape first by pinning both ends of the string to the cardboard
- Take a marker pen and hold the string tight with one end whilst you trace around the pins in order to create the ellipse shape.
- Now carefully cut the resulting shape using scissors.
Step 3: Place Marks On Important Points
- Locate where the pins were and mark them down as the foci.
- Make sure to clarify by labeling and drawing the axes on your ellipse.
Step 4: Build The Model
- Hold the cardboard cut out vertically on a level surface.
- One of the foci should have a weight on it which will aid in depicting the central body. (In most cases it would be a star or a planet).
Step 5: Show Orbital Motion
- Put a small coin or washer along the ellipse and push it gently so it appears to be orbiting.
- You can further examine the distance of the object from the main body in the middle elliptical path.
Step 6: Apply the Kepler laws
- First law:
Indicate why the weight would, for instance, the Sun, would be placed at one focus of the ellipse rather than the center.
Having done this, explain how planets, moons, satellites tend to go through similar actions.
- Second Law:
Demonstrate how an object that is positioned near the focus will move faster, but when positioned far away, they slow down.
Examine the ways in which gravity effects this change in speed.
Step 7: Tell The Users About These Elements In Action
Make use of the model to demonstrate the orbits of:
- Earth, Mars and other planets.
- Halley’s Comet, along with other comets that have highly eccentric orbits.
- Satellites that usually have elliptical orbits to provide greater coverage.
Step 8: Allow Them To Ask ‘What If’ Questions
Ask students or people to:
- Make predictions as to what would happen to the orbital path if the central object changes mass.
- Put forward reasons that state how speed and distance affects the shape of the orbit.
- Connect those innovations to modern space techniques satellite launching or exoplanet surveying.
Addressing Common Misconceptions
It’s rather easy to misunderstanding celestial mechanisms and here are some important truths regarding such misinterpretations.
- Misconception: Orbits are circular.
- Reality: A majority of orbits are elliptical but the amount of stretch or degree of eccentricity differs.
- Misconception: Any body which has elliptical orbit moves at the same speed throughout.
- Reality: The speed of a body changes while moving in the orbit and is explained by Kepler’s Second Law of Planetary Motion.
- Misconception: An orbit is a path that is stable at all times.
- Reality: Stability refers to the balance of several forces such as gravity and velocity.
Tackling these misconceptions will ensure that you gain comprehensive knowledge of orbital mechanics.
Supplementary Materials
As a part of self-study:
- Draw an ellipse and label its major and minor axes and their respective foci.
- Sketches of Kepler’s Laws of Motion should also be drawn with emphasis on the speed of the orbiting body and the shape of the orbit.
- Depict a real life chart of orbital speed of various celestial objects.
- All students and even those interested will benefit from these visual aids as they help in grasping concepts more easily.
Practical Illustrations of Elliptical Orbits
- Moons: Like Earth many moons are in Elliptical Orbits due to gravity.
- Artificial Satellites: Such as GPS satellites which are in elliptical orbits to cover wide areas.
- Comets: Halley’s Comet has a highly eccentric orbit that can be seen from Earth once in 76 years.
These illustrations aid in giving a perspective of the principle behind your cardboard model and its relation to outer space.
Final Thoughts
Building a cardboard cutout of an elliptical orbit isn’t just a fun activity—it’s a lens through which to view the mechanics of the universe. Whether you’re a student exploring space, a teacher inspiring curiosity, or an enthusiast deepening your understanding, this hands-on guide transforms theory into practice.
Start building your own cardboard cutout of an elliptical orbit today and discover why celestial mechanics is as beautiful as it is brilliant. Who knows—you might just spark the next great scientific breakthrough!